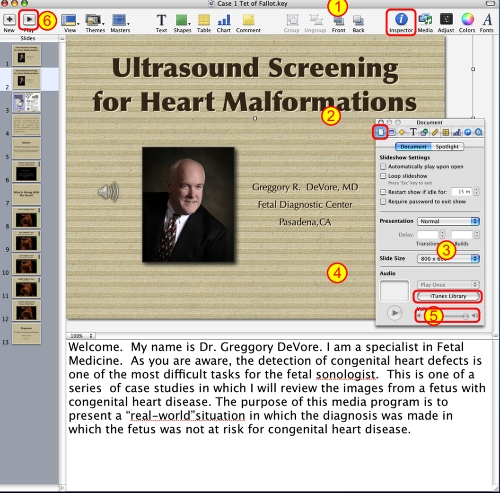
Keynote Presentation: Step 1
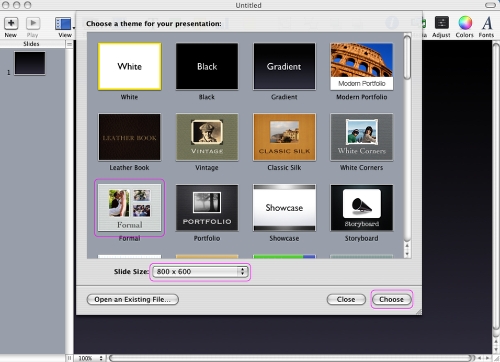
I prefer KEYNOTE instead of PowerPoint because the transisition between slides is better when audio is added to each slide. With my version of PowerPoint the audio icon flashes on the screen at the beginning of each slide. I find this distracting. After launching KEYNOTE select a theme for your presentation, select the slide size (800 x 600) and then click the CHOOSE button. The reason for selecting the slide size of 800 x 600 is because this is the size of the finished movie that will be created for the Podcast.
Keynote Presenation: Step 2
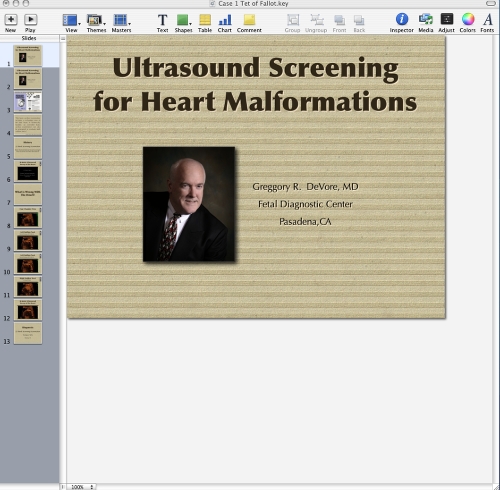
Create your presentation just as though you were going to present your talk. Include all of the images, titles, vidoe clips, etc. Once the slides are completed, you are now ready to create the text for each slide that will be spoken as each slide is displayed in the final presentation.
Keynote Presenation: Step 3
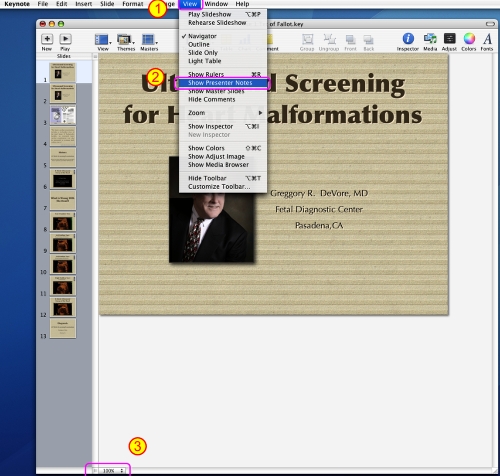
Click VIEW (1) followed by SELECT PRESENTER NOTES (2). Be sure that your window is large enough to see the white space below your slide. You can adjust the size of the slide on the screen by selecting the size of the screen. This is located at the bottom left of the screen (3).
Keynote Presentation: Step 4
In this example, I have created text that conveys the information for this particular slide. I have made the text large by adjusting the font size. This can be accomplished by clicking the FONT icon in the upper right of the program. A larger font size makes it easier to read when I record the audio.
Once I have entered text for the audio recording for each slide, I am now ready to record the audio.

Selecting a Microphone
Before you can record the audio, you must have a microphone to do so. This is a web page from PLANTRONICS. There are several microphones. The one that I have found useful has a red box around it. It is a USB combination microphone and earphones. It is virtually plug-and-play. After it is plugged in, you simply select the microphone as the source for the audio in and out. The next image illustrates how this is done with the MAC.
If you desire a more professional audio recording, then you would purchase a high-end microphone, software, additional hardware, etc. This can run between $1,000 and $3,000 and requires a professional to set up the hardware and software.

Activating New Audio Hardware
Once a new microphone is plugged into the computer, in this case using the USB connection for the Plantronics DSP 500, it is necessary to identify the new hardware. The first step (1) is to click the apple icon, located in the upper left corner of the screen. This dropdown menu appears. Then identiy System Preferences (2) and click this to enter the next screen.
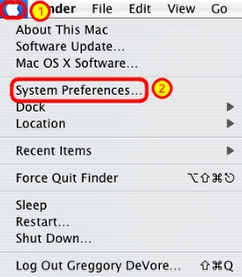
Activating New Audio Hardware
Click on the SOUND icon.
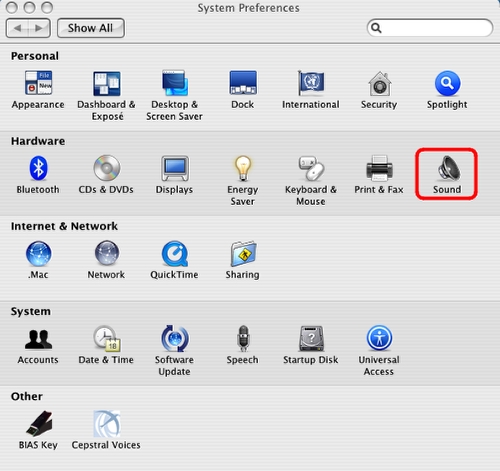
Activating New Audio Hardware
Select input. The default is INTERNAL MICROPHONE, highlighted in blue.
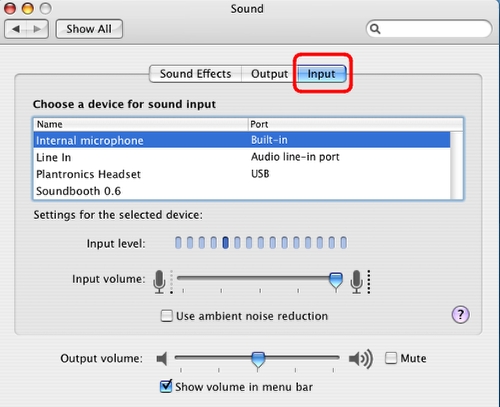
Activating New Audio Hardware
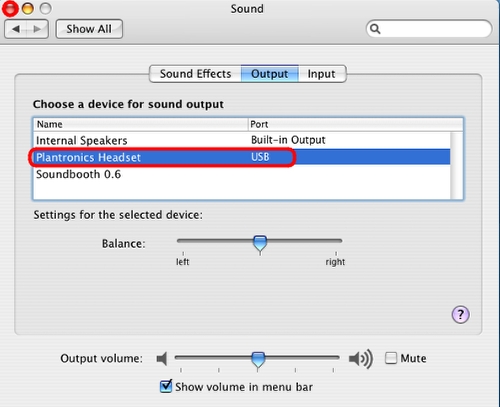
Click on PLANTRONICS HEADSET to activate the microphone for this device.
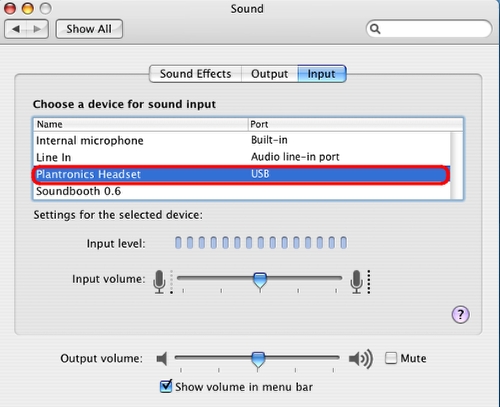
Activating New Audio Hardware
Now select OUTPUT. The default is INTERNAL SPEAKERS.
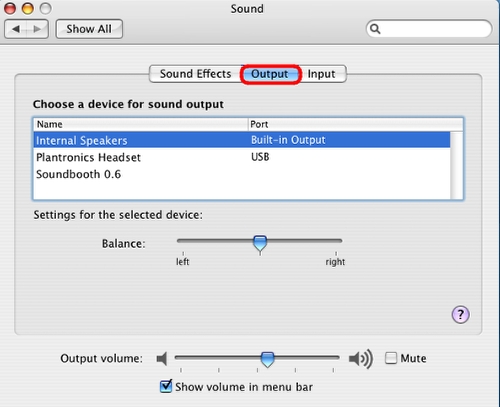
Activating New Audio Hardware
If you wish to listen to the audio through the headphones for the PLANTRONICS device, select PLANTRONICS HEADSET. Now close this page by clicking the upper left circle.
Audio Recording: Free Program
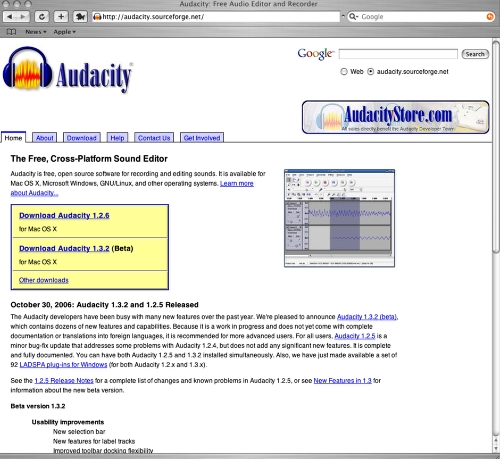
This is the webpage from which you can download a free audio recording program called AUDACITY. It is both Windows and MAC compatible. If you prefer other audio recording programs, then select the one you would like to choose.
The benefit of a program like AUDACITY is that you can record the audio, evalaute the audio waveform, and then cut segments that you do not like. Once finished, you can export the audio to a WAVE or MP3 file.
Recording Audio
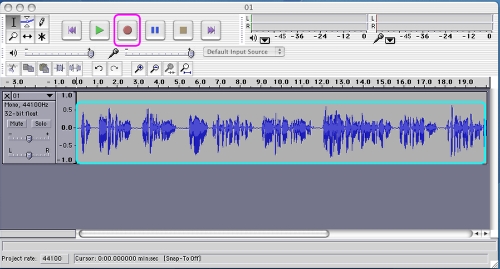
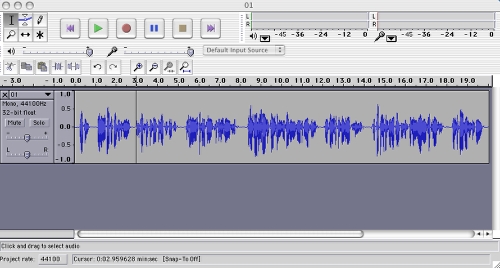
After selecting the microphone, you are ready to record. Simply click the red record button and start speaking. You will see the audio waveform displayed in the window. After recording, click the stop button and then click the play button to listed to the recording.
Recording Audio
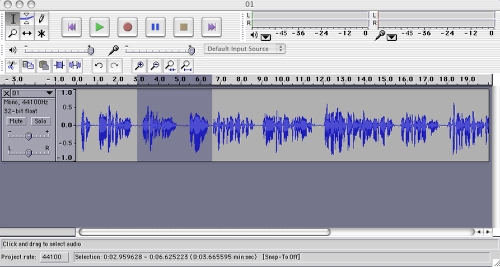
If there is a segment that you don't like, simply highlight it and then delete it.
Recording Audio
Once you have finished the recording, save the file as a wave or mp3 file. I create a directory in which I store the audio files. I label the audio file to correspond to the slide number in the Keynote presentation.
Inserting Audio File into Keynote Presentation
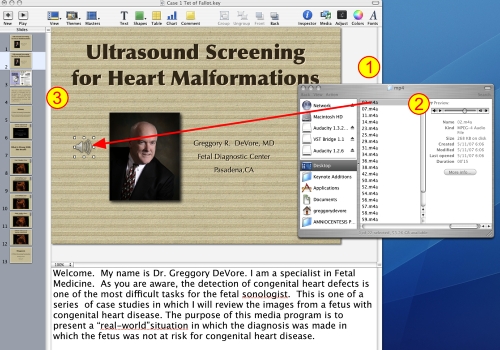
Once I have completed the recordings, I locate the file (1), double click it to listend to the audio (2) and then drag the file (1) to the corresponding slide (3). It appears as an audio icon.
Background Music
It is often desirable to have background music playing during the audio dialogue. To accomplish this do the following:
1. Click the INSPECTOR icon
2. Click the white page in the upper left of the Inspector screen.
3. Open iTunes and select the music file
4. After selecting the file it will appear in this window
5. Adjust the volume of the music.
When this is finished, click the play button (6) to listed to the presentation.
