Quicktime Movie
After Snapz Pro X has finished, a Quicktime movie will appear on the screen.

Quicktime Movie Information
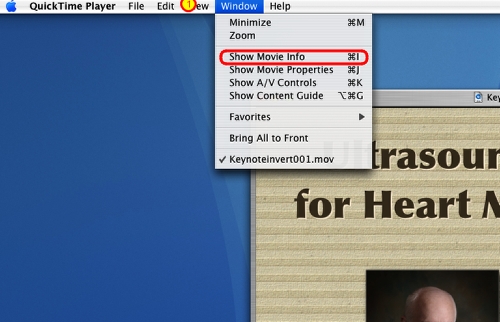
Click the WINDOW tab to see this drop down menu. Select SHOW MOVIE INFO
Quicktime Movie Information
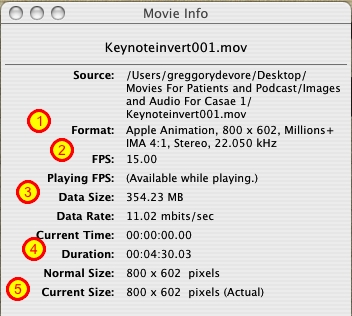
This contains information regarding the movie created with Snapz Pro X. The format demonstrates the codec used to create the movie which is Apple Animation (1). The movie was recorded at 15 frames per second (2). The size of the file is 354 megabytes (3). The duration of the movie is 4 minutes 30 seconds (4). The size of the movie is 800 x 602 pixels (5).
Creating A New Quicktime Movie for the Podcast
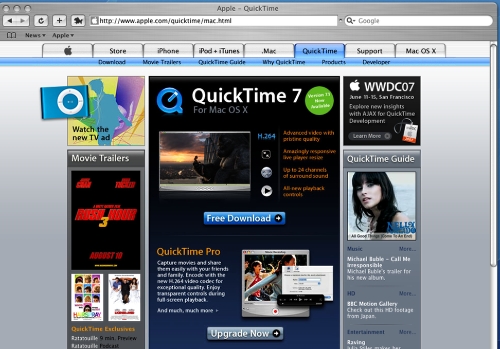
Before you can create a Quicktime movie for a PODCAST, you must first upgrade to QUICKTIME PRO. To do this, go to http://www.apple.com/quicktime/mac.html, click the UPGRADE NOW button and follow the instructions. QUICKTIME PRO is $30.00.
Creating A New Quicktime Movie for the Podcast
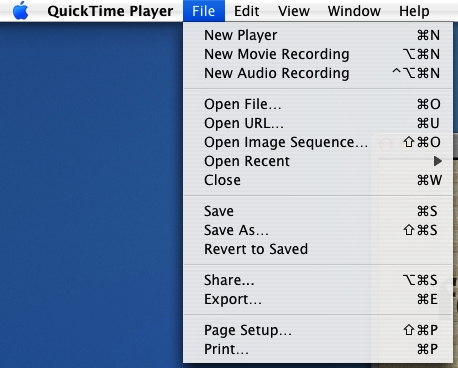
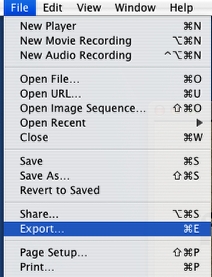
To create a Quicktime movie for the Podcast you must reformat the movie. Click FILE to view this drop down menu.
Creating A New Quicktime Movie for the Podcast
Now click EXPORT
Creating A New Quicktime Movie for the Podcast
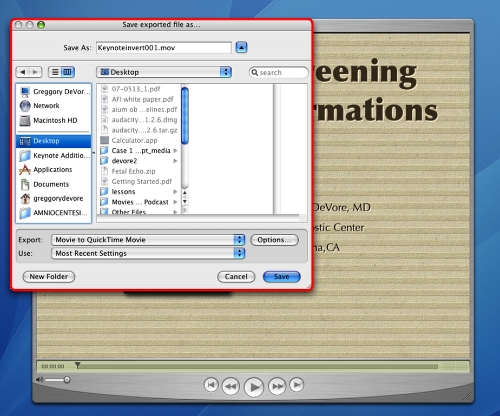
This menu will appear on the screen. Lets examine the contents more carefully.
Creating A New Quicktime Movie for the Podcast
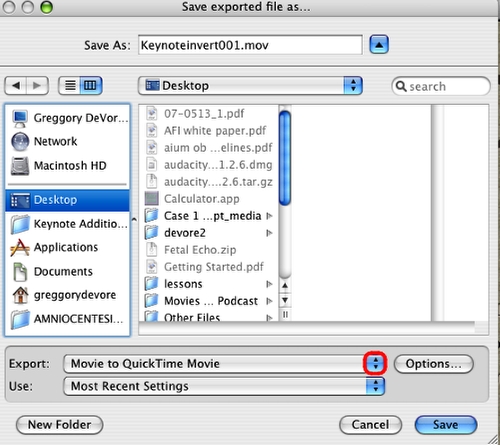
Click the drop down menu to review various export options.
Creating A New Quicktime Movie for the Podcast
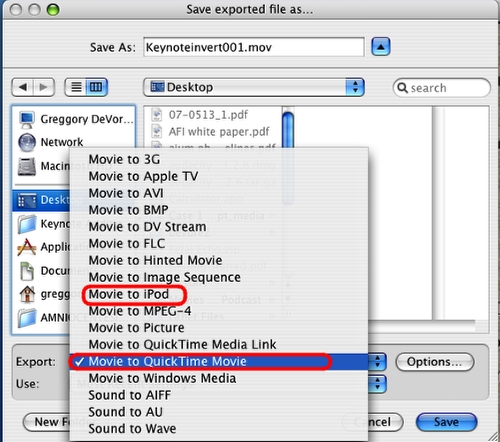
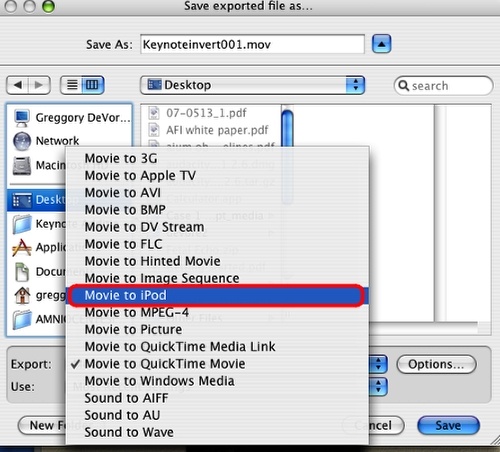
This is a selection of options. I will discuss MOVIE TO iPOD and MOVIE TO QUICK TIME MOVIE.
Creating A New Quicktime Movie for the Podcast
First, select MOVIE TO iPOD.
Creating A New Quicktime Movie for the Podcast
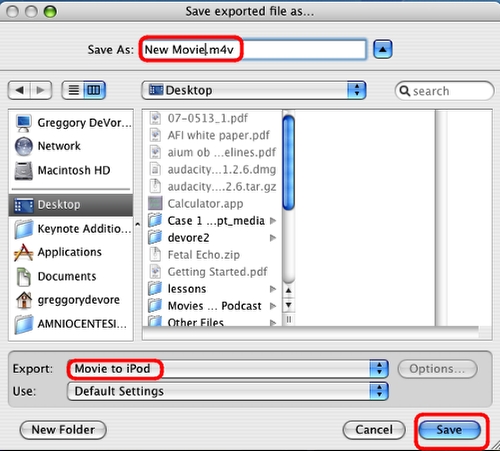
The MOVIE TO iPOD has a fixed frame rate and screen size. These options cannot be adjusted. If you choose to use this option, rename the movie and then click SAVE. The files created with this setting are usually larger than the files created with the MOVIE TO QUICKTIME MOVIE option listed below.
Creating A New Quicktime Movie for the Podcast
If MOVIE TO iPOD is selected, the movie is created. This may take several minutes, depending upon the size and lenth of the movie.

Creating A New Quicktime Movie for the Podcast
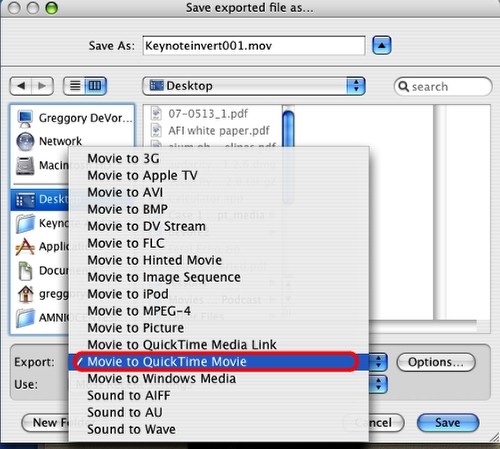
Lets now select the MOVIE TO QUICK TIME MOVIE option. This is the option that I prefer.
Creating A New Quicktime Movie for the Podcast
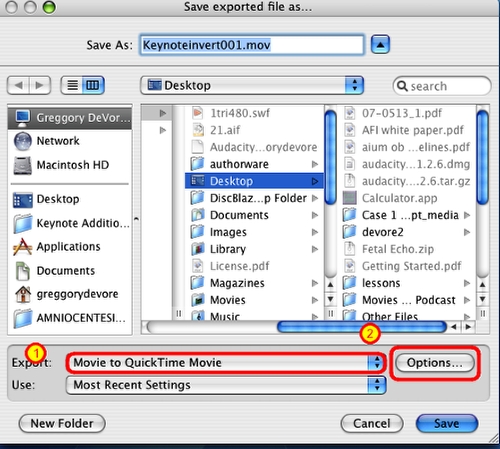
After selecting the MOVIE TO QUICK TIME MOVIE option (1), click the OPTIONS button (2).
Creating A New Quicktime Movie for the Podcast
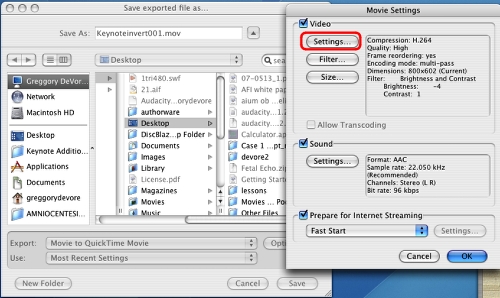
This is the menu that appears. First begin by clicking the SETTINGS button for the video.
Creating A New Quicktime Movie for the Podcast
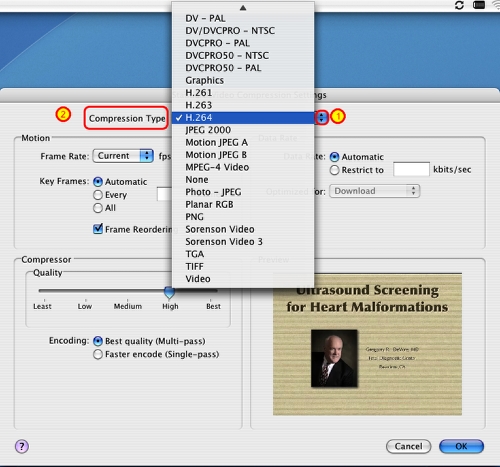
Click the drop down menu (1) for the COMPRESSION TYPE (2). The codec that I use is H.264. Therefore, select this codec.
Creating A New Quicktime Movie for the Podcast
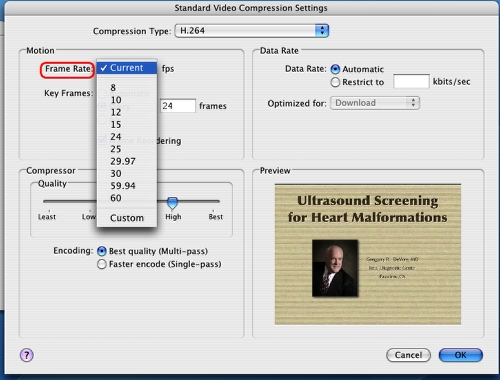
Next select the Frame Rate. If your presentation consists of slides with video clips (contracting heart, etc.) I would suggest selecting the CURRENT frame rate. Remember, for the movie used in these tutorials created with Snapz Pro X the frame rate was 15/sec.
Creating A New Quicktime Movie for the Podcast
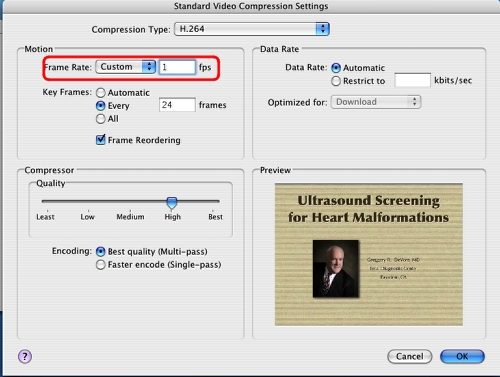
If the presentation consists of slides and transitions with no video, you may want to consider selectum CUSTOM. This allows you to determine the frame rate.

Creating A New Quicktime Movie for the Podcast
After the CUSTOM setting was selected, I entered a frame rate of 1/second. This results in the smallest file size. If, however, you have moving objects or video, then you should select 15 frames/second.
Creating A New Quicktime Movie for the Podcast
Return to the main menu and select FILTER.
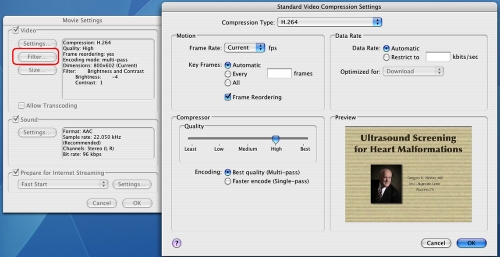
Creating A New Quicktime Movie for the Podcast
The filter menu allows you to adjust a number of parameters such as brightness and contrast.
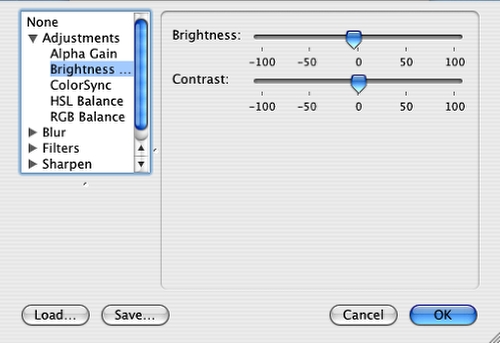
Creating A New Quicktime Movie for the Podcast
Return to the main menu and select SIZE. I think the optimal size for a PODCAST movie is 800 x 600 pixels. Since the presentation used in this tutorial was 800 x 600 pixels, the CURRENT size was selected.
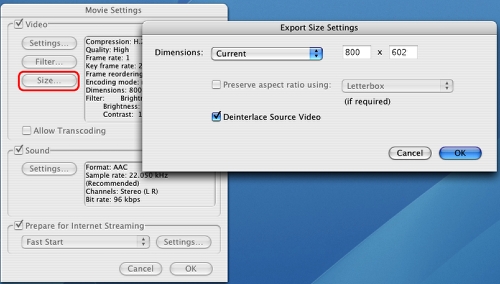
Creating A New Quicktime Movie for the Podcast
Once all of the parameters, as listed above, have been changed, you are now ready to save the movie. Rename the movie and then click SAVE.

Creating A New Quicktime Movie for the Podcast
Once the SAVE has been clicked, this will appear as the movie is being created. Once the Export process has been completed, the movie will be ready for the PODCAST.
